

It’s all the rage and just started up as a fad… using projectors to cast an image onto a table top for the running of games like D&D (honestly, I’ve not heard of it used anywhere else, but it would be hugely useful for complex combat-oriented games like Dark Heresy as well). I first saw this a few months ago and my first impression from the most common Google Search and links was “I bet we can do that”.
I felt comfortable putting in the effort to put together the well documented and talked about Projector Table-Top given how agreeable my group is to The Game being more important than any individual story in it. I wouldn’t waste the effort or expense on a group that is going to fight change. So if your group embraces change? I recommend this for you.
Check it out…
First off, I don’t own a home theater projector and I would argue you don’t at all need one. Mine is an office projector, digital, medium resolution (not HD). It’s unspectacular. I got it for my home office ages ago and never use it. Truth be told, you don’t need a “good” projector. Get any old normal used office projector–you can get great refurbished ones online for a couple of hundred bucks that are going to have thousands of hours of lamp time left.
Second, I have never done this before–so, consider this a first pass. This was done as a test. And after playing, today, with it… well, I think we’ll re-engineer it to be even better. But, this build was done on the fly in a day using only materials you can get at a craft store. Pretty low cost and low-effort.
Supplies (Go to a Michael’s or Joanne’s Fabrics and Crafts or Anywhere But Hobby Lobby–Unless You Must)
I needed:
1x office projector
1x square craft store framed chalkboard (this was maybe 4 dollars) to serve as the base (1 square foot)
2x balsa wood door hangers (a couple of bucks each) to serve as the arms that hold angle board
1x wood slat to be an angle board, sits at a 45 degree angle between the arms, holds the mirror (1 foot wide, a dollar)
1x normal mirror (five bucks, 8 inches square) that you turn into a front-surface mirror
Then hardware like four small steel eyebolts, 4 lengths of light chain (4 inches long each), 4 steel loops, 4 ceiling hooks, bunch of tiny nails. Get a roll of sticky side velcro to help fasten some things (in a way you can dismantle and adjust easily).
The only real challenging part, honestly, was making the mirror. How you turn a normal mirror into a front-surface mirror (so the light is reflecting off the reflective silver on the front rather than refracting through the glass and then reflecting off the silver backing) is well documented all over the internet, but here’s my quick guide:
Making a Front Surface Mirror for a Dollar or Five
Step 1: Put the mirror (glass down, paint backing up) into a container that won’t melt when you pour paint stripper on it. Make sure there aren’t any stickers or things in the way on the back.
Step 2: Put paint stripper on the back. Coat the crap out of it. Get good coverage. Overdo it it you want and wear good gloves, please.
Step 3. Wait about a good half hour.
Step 4. Come back, see the puckering and rippling of the paint? With a gloved hand, take something very non-abrasive (the silver lining is delicate) like a cotton ball or something and gently sweep the floating paint goop off the back. Reveal the shiny underthing.
Step 5: Take out the mirror. Rinse it off in a pan or bucket of water (or run warm water over it at low pressure). A little soap wouldn’t hurt. You just want to get most of the paint stripper off.
Step 6: To get the remaining residue of goop off, use acetone and a gentle swab of cotton and clean your new front-surface mirror. Keep in mind, acetone will dry off without streaks if you do it right and thoroughly.
That’s it. Done. Welcome to having a front-surface mirror.
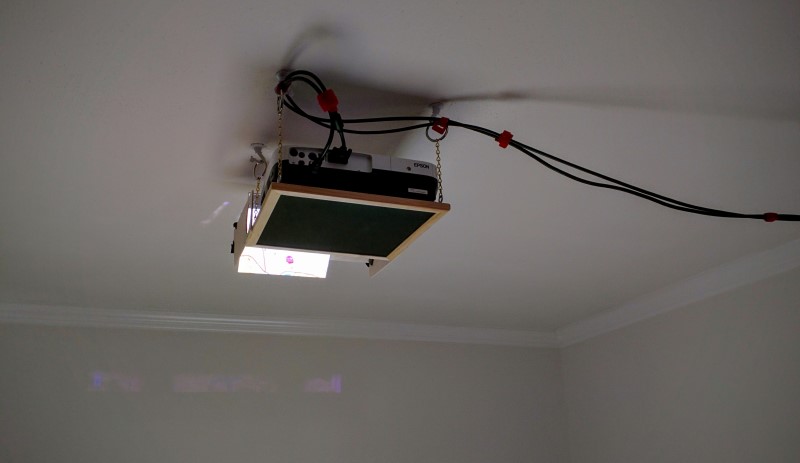
The One-Piece Hanging Unit
Here’s how I assembled the pieces together. You can see pretty cleanly how it all fits, and we’ll be doing a step-by-step next month when we re-engineer this. Total costs? We spent about forty dollars. Another ten for a white table cloth.
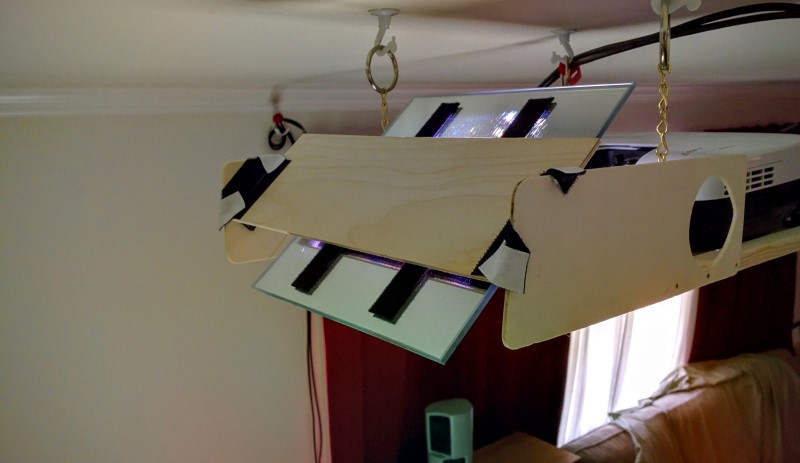

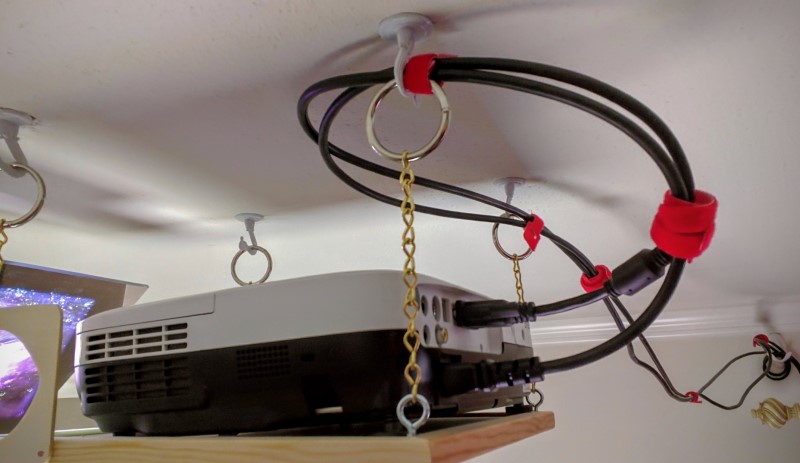
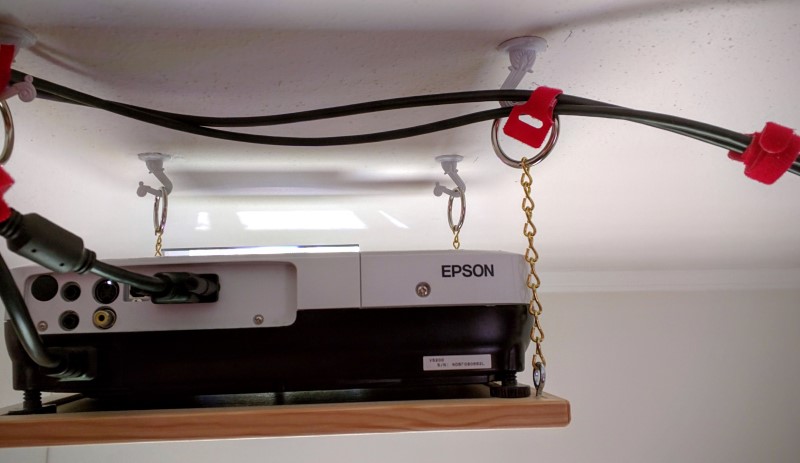
We used a long damn VGA cord and computer power cord gaffed to the side to make this work.
Ultimately, we designed it this way because we wanted the whole thing to be its own unit. My special lady friend had a small heart attack when she found out I wanted to take the dining room (which, ours is nice, really) and drill holes and hang machines. I only got her to agree by promising that I could “put it up and take it down” often and easily. That precluded lots of designs… One unit, all together, big rings on easy hooks. That was the goal.
Here is the result:
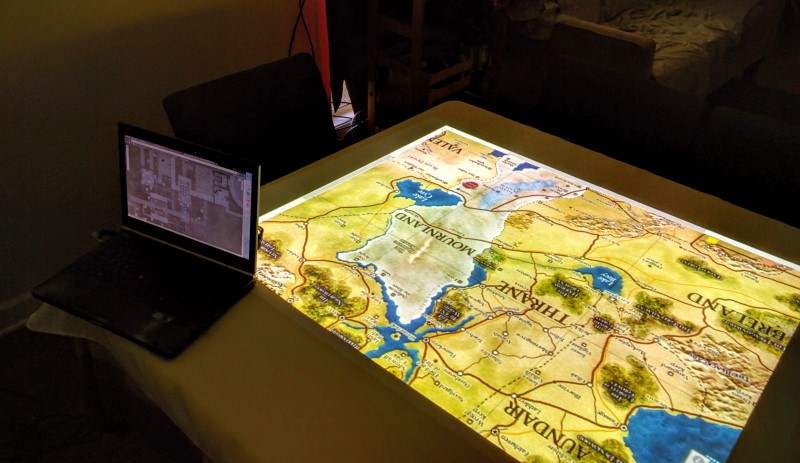
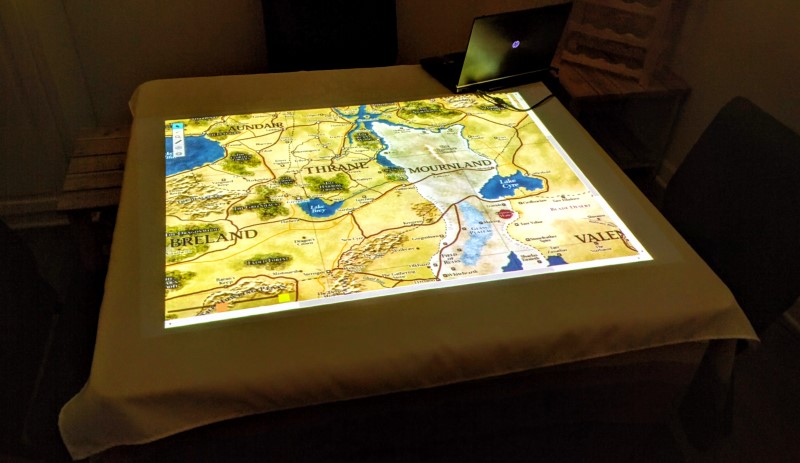
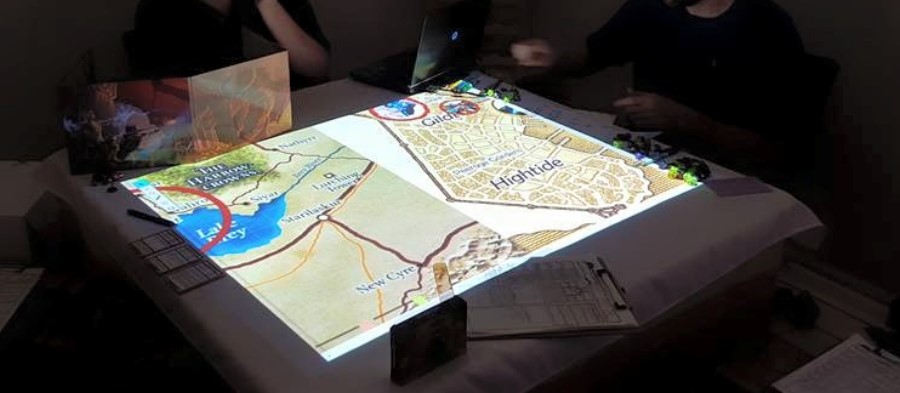
So, my group was surprised this morning when we started. Our Eberron game never looked so good. I’m an old hand at Roll20, so using the “incognito” tab pulled to the projector’s second monitor meant there was a player view while my GM view in Roll20 allowed me to manipulate everything.
A lot of these builds out there have been people using it for the map feature. We decided to put my Roll20 skills to bear (which I was a deft hand at that a couple of years ago, Dynamic Lighting and objects and macros and all sorts of things). So our game was 100% virtually cast. Player tokens and spell area effects and all that. Without physical models, using only the full interface, it was more “work” for me (more I had to be certain of, like knowing hotkeys and not just “struggling through”)… but, it went seamless and probably twice as fast as combat usually takes.
I’ll have pictures of our game (with the whole dungeon, dynamic set up and key screenshots of how we played it) next week.
Meantime, if you have an old projector and your special lady friend doesn’t mind you drilling holes and setting flowery decorative white hooks into the ceiling… and your group isn’t the kind that will quibble over some basic assumptions to use Roll20 (more on that next week), it’s a fun tool and can replace a lot (not necessarily all) of your play time with some practice on the DM’s part.
And yes, it’s a great group… everyone owns their own PHB, there are three DMG’s around the table, every Gale Force Nine spell card set at hand, 32 lbs. linen glossy paper character sheets on clipboards, cedar hardwood pencils… etc.
Also, fresh bakery pastries and croissants every morning. 18 year old us would be jelly.

Neat setup. Just curious, what’s the beef against Hobby Lobby?
LikeLike
Hobby Lobby is a terrible corporation that, among other things, imposes its own brand of religion on its employees and was convicted in 2017 of smuggling religious artifacts out of Iraq that had been looted by ISIS.
LikeLike
This is excellent. I’m looking forward to trying this out myself!
LikeLike
Mẹo nhỏ khi copy sáchpdf vào trực tiếp
vào Kindle.
LikeLike