So, we’ve tested out a number of mini solutions. Cardboard stands (too light, too fragile, seem to look nice but feel in the way). Reaper minis (beautiful but not cheap to field a whole game of NPCs and monsters with). D&D minis (beautiful and perfect, but definitely expensive) and everything else under the sun, it seems.
What we game with most times are simple to make, materially tough and robust enough to handle drops and sloppy packing and unpacking, clear and clean to see from across the table, useful for tracking actual combats, and even customizable for players.
These are our “everyday clay” minis.
To make them, it couldn’t be simpler.
- Get some bulk brick of white clay – we used Sculpey Primo Art Clay because my special lady friend knows home crafts and said to get it. $15
- Get some small samples of colored clay – we used the Sculpey sampler because I felt weird about not keeping all in the same brand. $15
- Get some 5/8″ steel washers (you can go to Home Depot and get a dozen or two for a dollar or two), 3/4″ steel washers (also cheap), 1″ steel washers (cheap, you don’t need more than 5 or 10), some 1 3/4″ washers (harder to find), and if you can manage it find some 2 1/2″ ones. I could find the next up size online in brass as 3 1/2″. These are the different size categories from small on up. All my washers were one trip to the hardware store and I dropped about $10
$40 in so far.
- Optionally, get some clay stamps (letters, numbers) or really ink stamps if they’re all you can find at the craft store. This is optional, because you can really just freehand anything you want–I did stamps because I’m picky. They cost about $10. I’m in for $50 now.
The process is easy and I regret not shooting photos of it at the time. This is for a medium (3/4″) creature:
Start with a lump of white clay about as big as the ball of your thumb. Not huge. Roll it into a ball. Press it into the washer (not too hard, you don’t need to push it “through”, just get them nestled together). Then you squish it down and roll it on it’s sides until it’s a smooth cylinder with the washer as its bottom. That’s it. Shape as desired or smooth out as needed. Stamp it with a letter or number and set it aside. Next. Repeat.
I used most of my white clay and barely a quarter of my colored clay to make a half dozen huge “minis”, two dozen medium, a dozen large or so, 15 small. Etc. Just go wild. Bake them according to the directions and that’s it.
After they cool you can paint pen fill in the numbering or lettering or just use a felt tip pen. The washers will be a little loose, so take them off and PVC (Elmers) glue them back on and let them dry.
Voila.
They’re nicely weighted, slide across a battle mat, are easy to identify by anyone at the table (“I swing my axe at the hobgoblin…!” … “Which one?” … “E”). They’re very durable and take a pounding. The colored clay I use for PC’s. Each of my players have their “color”.
And, with nearly fifty of these things in various sizes, I’m at $1 a pop and a quarter of that is a one time expense. I promise, as long as you don’t mind the imagination part, these are the best every day minis you’ll ever use.
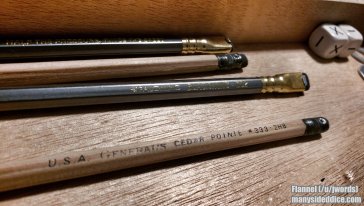
(I also recommend good pencils, all.., get some Palamino Blackwings if you have the means or some Cedar Generals if you’re on the cheap. Good pencils are the forgotten perfection.)


It seems that if you’re the artsy type, you could easily draw things on the baked clay once it’s done instead of letters or even use stickers of some kind? Good walk-through though, will definitely be trying these!
LikeLiked by 1 person